How to Pack a Laundry Room for Moving Without the Mess and Confusion
Packing a laundry room for moving is trickier than it looks — appliances need proper prep, liquids need careful sealing, and small parts are easy to lose.
Knowing how to pack a laundry room for moving is one of those tasks that gets pushed to the bottom of the list — and then causes real problems on moving day. Laundry rooms look like simple spaces, but they are home to large, heavy appliances that require specific preparation, an assortment of liquid products that will leak without warning, and a tangle of hoses, cords, and accessories that are easy to lose and expensive to replace. None of it packs itself, and very little of it forgives a rushed approach. It does not have to go that way.
If you would rather have experienced professionals handle the heavy lifting while you focus on keeping your household running, call our team at 719-357-9048 to lock in your move date.
Whether you have a dedicated laundry room, a closet-sized nook with a stacked unit, or a garage setup with a utility sink and shelving full of cleaning supplies, the strategy below will walk you through every category — from your washer and dryer to the last dryer sheet — so nothing arrives leaking, broken, or mysteriously separated from the machine it belongs to.
Why Packing a Laundry Room Goes Wrong More Often Than It Should
The laundry room is one of the most consistently underestimated rooms in any move. It looks like a small space with a couple of appliances and a few shelves of supplies — and so people assume it will take thirty minutes to clear out. That assumption leads to disconnected hoses left behind, detergent that leaks through an entire box, washer drums that shift in transit and cause internal damage, and accessories that end up packed in random boxes and never found again.
Three specific patterns cause the majority of laundry room packing failures:
- Not preparing appliances before the movers arrive — a washer that has not been properly drained, balanced, and secured for transit is at risk of drum damage and water leakage during the move. This is not something to handle the morning of moving day. It requires time the day before, at minimum.
- Packing liquids carelessly — laundry detergent, fabric softener, bleach, and stain removers are all liquids that will find a way out of their containers if they are tipped, squeezed, or jostled in a moving box. Packing them upright with sealed lids in leak-proof bags is not optional — it is the difference between arriving with your supplies intact and arriving with a box full of ruined items.
- Losing small parts and accessories — washing machine hoses, dryer vent duct connectors, lint trap covers, and pedestal drawer contents all tend to disappear in a move. They are small, they look like hardware odds and ends, and they end up in unlabeled boxes or get left behind entirely. Replacing them costs time and money at the worst possible moment.
The fix is a methodical, category-by-category approach — starting with appliance prep well before moving day, working through supplies and accessories, and ending with a labeling system that keeps everything together at the destination.
Step One: Prepare Your Washer and Dryer Before Packing Day Arrives
Appliance preparation is the single most time-sensitive task in a laundry room move, and it is the one most people leave too late. Your washer and dryer need to be disconnected, cleaned out, and ready to move before your movers arrive — not during the move itself.
Preparing the Washer
Start by running a cleaning cycle or a short empty cycle to flush out any remaining water from the drum and the hoses. Once that cycle is complete, turn off the water supply valves behind the machine — typically one for hot and one for cold. Disconnect the inlet hoses from the wall valves first, then from the back of the machine, and have a bucket and towels ready because water will remain in the hoses even after the cycle. Drain the hoses completely before packing them.
Next, check your washer's documentation or the manufacturer's website for drum-securing instructions. Many top-load and front-load washers come with shipping bolts that should be reinstalled for transit to prevent the drum from moving and damaging the internal suspension system. If you no longer have the original bolts, contact the manufacturer — replacement shipping hardware is often available and worth the effort to obtain before moving day.
Clean the drum interior, wipe down the exterior, and leave the door or lid slightly open to allow any remaining moisture to evaporate. Tape the lid or door shut with painter's tape only — never wrap the machine in stretch wrap before it has fully dried, as trapped moisture leads to mold.
Preparing the Dryer
For a gas dryer, the gas line must be shut off and disconnected before the machine moves. Unless you are experienced with gas appliance connections, this step should be handled by a licensed professional. Do not skip it — a gas line that is improperly disconnected is a serious safety hazard.
For an electric dryer, unplug the power cord and coil it neatly. Disconnect the dryer vent duct from the back of the machine and from the wall vent. Dryer vent ducts are often damaged in moves because they are fragile and awkwardly shaped — if yours is old, this is a good time to replace it rather than pack it. Clean the lint trap thoroughly before transit.
Wipe down the exterior of both machines, tape doors shut for transit, and set both units aside in an accessible area so movers can maneuver them out without navigating around other boxes.
Step Two: Sort and Pack Your Laundry Supplies the Right Way
Laundry supplies are one of the messier packing categories in any home. The goal is to arrive at the new place with your supplies intact, usable, and accessible — not to spend your first evening cleaning detergent out of a box of linens.
Declutter Before You Pack
Before packing a single bottle, do a hard audit of what is actually worth moving. Laundry rooms accumulate half-empty containers of products that nobody uses anymore, stain removers that have been sitting under the sink for two years, and duplicate items from the last time someone bought something without checking the supply first. Moving is the right time to use up, donate, or dispose of anything that is almost empty or past its useful life. Fewer containers means fewer opportunities for leaks and a lighter load overall.
Seal and Protect Liquid Containers
For any liquid container you are keeping, take the following steps before packing: tighten the cap as firmly as it will go, then wrap the cap area with plastic wrap and secure it with a rubber band. Place each container in a zip-lock bag before putting it in a box. Pack liquids upright and never on their sides. Label the box clearly as containing liquids and instruct movers to keep it upright at all times.
Bleach deserves special handling — it is corrosive and should be packed separately from any other supplies. If the bottle is nearly full, consider using it up or disposing of it safely rather than moving it.
Pack Dry Supplies Simply
Dry supplies like laundry pods, dryer sheets, and powdered detergent are significantly easier to pack. Fold over the tops of any open boxes or bags and seal them with tape. Pack these items in small to medium boxes. They are not heavy, but they do have volume — do not try to cram them in with heavier items where they will get crushed.
Step Three: Collect and Label Every Hose, Cord, and Accessory
The small parts of a laundry room are easy to overlook and costly to replace. Take a systematic approach before any boxes are sealed.
Hoses and Connections
The inlet hoses for your washer — typically two, one for hot and one for cold — should be coiled neatly and placed in a labeled zip-lock bag. Include the fittings. If your hoses are rubber and more than five years old, this is a reasonable time to replace them rather than move aged hoses that may fail at the new place. New washer hoses are inexpensive and widely available.
The dryer vent duct and any associated clamps or connectors should go in a separate labeled bag. If your dryer has a power cord that disconnects from the machine, coil and label that as well.
Utility Sink and Shelving Accessories
If your laundry room has a utility sink, remove any items stored beneath it and pack them with your cleaning supply boxes. Drain the P-trap by running water and then clearing the area. If you have wall-mounted shelving you are taking with you, photograph the mounting configuration before disassembly so reinstallation is straightforward.
Pedestal drawers that attach to front-load washers and dryers often contain small items — extra lint brushes, spare parts, instruction booklets. Empty these completely before moving day and pack the contents in a labeled bag that travels with the machine documentation.
Step Four: Label Everything for a Fast Setup at the New Place
The laundry room is one of those spaces you want functional as quickly as possible in a new home. Strategic labeling on moving day makes that happen significantly faster.
Label every box from the laundry room with the room name and a brief content description: Laundry — Detergents and Fabric Softener (Upright), Laundry — Hoses and Dryer Accessories, Laundry — Dry Supplies. Keep all laundry room boxes together so they are unloaded into the same area of the new space.
Keep the bag of hoses, cords, and connections with you or clearly separated from the appliances during the move — not taped to the back of the machine where it can fall off in transit. When you arrive at the new home, that bag needs to be immediately accessible so reinstallation can begin.
If your new home requires any different hookup configuration — a different dryer outlet type, a gas connection instead of electric, or a different vent route — arrange for that assessment and any necessary work before moving day so you are not waiting days for the laundry room to become functional.
When to Call Professionals for the Laundry Room
Some parts of a laundry room move are genuinely not DIY tasks. Gas dryer disconnection and reconnection should always be handled by a licensed professional. If your washer or dryer is stacked, a stacking kit removal and reinstallation often requires two people and specific knowledge of the unit — attempting it alone risks dropping an appliance and injury. Large-format front-load machines on pedestals are extremely heavy and awkward to maneuver through doorways without the right equipment and team.
A professional moving team handles appliance moves regularly and arrives with the dollies, straps, and knowledge needed to move washers and dryers safely without damaging floors, doorframes, or the machines themselves. If the laundry room is the part of your move that is making you most nervous, that is a reasonable signal to bring in help.
Our team at Men on Mission handles appliance moves as part of full-service relocations throughout the Colorado Springs area. If you want the laundry room — and every other room in your home — handled correctly from start to finish, get a free quote from Men on Mission and we will walk you through exactly what moving day will look like.
Frequently Asked Questions
Do I need to do anything special to prepare my washer before a move?
Yes. You should run a final empty cycle to flush out water, turn off and disconnect the inlet hoses, drain the hoses completely, and reinstall the shipping bolts in the drum if you have them. Leaving the door slightly open to dry out the interior is also important to prevent mold. Ideally, complete all washer prep the day before moving day — not the morning of.
Can I move a gas dryer myself?
You can move the physical appliance with the help of a moving team, but the gas line disconnection and reconnection must be handled by a licensed professional. Disconnecting a gas line without the proper training and tools is a serious safety hazard. Arrange for a technician to disconnect the gas supply before the movers arrive and to reconnect it once the dryer is in place at the new home.
How do I pack liquid detergent and other laundry supplies so they don't leak?
Tighten caps as firmly as possible, then wrap the cap area with plastic wrap secured with a rubber band. Place each liquid container in a zip-lock bag before boxing it. Pack all liquids upright, never on their sides, and label the box clearly so movers know to keep it upright throughout the move. For bleach, consider using it up or safely disposing of it rather than moving a full bottle.
Should I replace my washer hoses before the move?
If your rubber inlet hoses are more than five years old or show any signs of cracking, bulging, or mineral buildup, a move is a smart time to replace them rather than reinstall aged hoses at the new home. New washer hoses are inexpensive and widely available at hardware stores. Replacing them before the move avoids the risk of a hose failure shortly after you settle in.
What small parts should I be careful not to lose during a laundry room move?
The items most commonly lost in laundry room moves include washer inlet hoses and their fittings, dryer vent duct connectors and clamps, dryer power cords (if they detach from the machine), shipping bolts for the washer drum, lint trap covers, and the contents of pedestal drawers. Collect all of these into clearly labeled zip-lock bags before moving day and keep the bags with you rather than taped to the appliances.
Knowing how to pack a laundry room for moving is one of those tasks that gets pushed to the bottom of the list — and then causes real problems on moving day. Laundry rooms look like simple spaces, but they are home to large, heavy appliances that require specific preparation, an assortment of liquid products that will leak without warning, and a tangle of hoses, cords, and accessories that are easy to lose and expensive to replace. None of it packs itself, and very little of it forgives a rushed approach. It does not have to go that way.
If you would rather have experienced professionals handle the heavy lifting while you focus on keeping your household running, call our team at 719-357-9048 to lock in your move date.
Whether you have a dedicated laundry room, a closet-sized nook with a stacked unit, or a garage setup with a utility sink and shelving full of cleaning supplies, the strategy below will walk you through every category — from your washer and dryer to the last dryer sheet — so nothing arrives leaking, broken, or mysteriously separated from the machine it belongs to.
Why Packing a Laundry Room Goes Wrong More Often Than It Should
The laundry room is one of the most consistently underestimated rooms in any move. It looks like a small space with a couple of appliances and a few shelves of supplies — and so people assume it will take thirty minutes to clear out. That assumption leads to disconnected hoses left behind, detergent that leaks through an entire box, washer drums that shift in transit and cause internal damage, and accessories that end up packed in random boxes and never found again.
Three specific patterns cause the majority of laundry room packing failures:
- Not preparing appliances before the movers arrive — a washer that has not been properly drained, balanced, and secured for transit is at risk of drum damage and water leakage during the move. This is not something to handle the morning of moving day. It requires time the day before, at minimum.
- Packing liquids carelessly — laundry detergent, fabric softener, bleach, and stain removers are all liquids that will find a way out of their containers if they are tipped, squeezed, or jostled in a moving box. Packing them upright with sealed lids in leak-proof bags is not optional — it is the difference between arriving with your supplies intact and arriving with a box full of ruined items.
- Losing small parts and accessories — washing machine hoses, dryer vent duct connectors, lint trap covers, and pedestal drawer contents all tend to disappear in a move. They are small, they look like hardware odds and ends, and they end up in unlabeled boxes or get left behind entirely. Replacing them costs time and money at the worst possible moment.
The fix is a methodical, category-by-category approach — starting with appliance prep well before moving day, working through supplies and accessories, and ending with a labeling system that keeps everything together at the destination.
Step One: Prepare Your Washer and Dryer Before Packing Day Arrives
Appliance preparation is the single most time-sensitive task in a laundry room move, and it is the one most people leave too late. Your washer and dryer need to be disconnected, cleaned out, and ready to move before your movers arrive — not during the move itself.
Preparing the Washer
Start by running a cleaning cycle or a short empty cycle to flush out any remaining water from the drum and the hoses. Once that cycle is complete, turn off the water supply valves behind the machine — typically one for hot and one for cold. Disconnect the inlet hoses from the wall valves first, then from the back of the machine, and have a bucket and towels ready because water will remain in the hoses even after the cycle. Drain the hoses completely before packing them.
Next, check your washer's documentation or the manufacturer's website for drum-securing instructions. Many top-load and front-load washers come with shipping bolts that should be reinstalled for transit to prevent the drum from moving and damaging the internal suspension system. If you no longer have the original bolts, contact the manufacturer — replacement shipping hardware is often available and worth the effort to obtain before moving day.
Clean the drum interior, wipe down the exterior, and leave the door or lid slightly open to allow any remaining moisture to evaporate. Tape the lid or door shut with painter's tape only — never wrap the machine in stretch wrap before it has fully dried, as trapped moisture leads to mold.
Preparing the Dryer
For a gas dryer, the gas line must be shut off and disconnected before the machine moves. Unless you are experienced with gas appliance connections, this step should be handled by a licensed professional. Do not skip it — a gas line that is improperly disconnected is a serious safety hazard.
For an electric dryer, unplug the power cord and coil it neatly. Disconnect the dryer vent duct from the back of the machine and from the wall vent. Dryer vent ducts are often damaged in moves because they are fragile and awkwardly shaped — if yours is old, this is a good time to replace it rather than pack it. Clean the lint trap thoroughly before transit.
Wipe down the exterior of both machines, tape doors shut for transit, and set both units aside in an accessible area so movers can maneuver them out without navigating around other boxes.
Step Two: Sort and Pack Your Laundry Supplies the Right Way
Laundry supplies are one of the messier packing categories in any home. The goal is to arrive at the new place with your supplies intact, usable, and accessible — not to spend your first evening cleaning detergent out of a box of linens.
Declutter Before You Pack
Before packing a single bottle, do a hard audit of what is actually worth moving. Laundry rooms accumulate half-empty containers of products that nobody uses anymore, stain removers that have been sitting under the sink for two years, and duplicate items from the last time someone bought something without checking the supply first. Moving is the right time to use up, donate, or dispose of anything that is almost empty or past its useful life. Fewer containers means fewer opportunities for leaks and a lighter load overall.
Seal and Protect Liquid Containers
For any liquid container you are keeping, take the following steps before packing: tighten the cap as firmly as it will go, then wrap the cap area with plastic wrap and secure it with a rubber band. Place each container in a zip-lock bag before putting it in a box. Pack liquids upright and never on their sides. Label the box clearly as containing liquids and instruct movers to keep it upright at all times.
Bleach deserves special handling — it is corrosive and should be packed separately from any other supplies. If the bottle is nearly full, consider using it up or disposing of it safely rather than moving it.
Pack Dry Supplies Simply
Dry supplies like laundry pods, dryer sheets, and powdered detergent are significantly easier to pack. Fold over the tops of any open boxes or bags and seal them with tape. Pack these items in small to medium boxes. They are not heavy, but they do have volume — do not try to cram them in with heavier items where they will get crushed.
Step Three: Collect and Label Every Hose, Cord, and Accessory
The small parts of a laundry room are easy to overlook and costly to replace. Take a systematic approach before any boxes are sealed.
Hoses and Connections
The inlet hoses for your washer — typically two, one for hot and one for cold — should be coiled neatly and placed in a labeled zip-lock bag. Include the fittings. If your hoses are rubber and more than five years old, this is a reasonable time to replace them rather than move aged hoses that may fail at the new place. New washer hoses are inexpensive and widely available.
The dryer vent duct and any associated clamps or connectors should go in a separate labeled bag. If your dryer has a power cord that disconnects from the machine, coil and label that as well.
Utility Sink and Shelving Accessories
If your laundry room has a utility sink, remove any items stored beneath it and pack them with your cleaning supply boxes. Drain the P-trap by running water and then clearing the area. If you have wall-mounted shelving you are taking with you, photograph the mounting configuration before disassembly so reinstallation is straightforward.
Pedestal drawers that attach to front-load washers and dryers often contain small items — extra lint brushes, spare parts, instruction booklets. Empty these completely before moving day and pack the contents in a labeled bag that travels with the machine documentation.
Step Four: Label Everything for a Fast Setup at the New Place
The laundry room is one of those spaces you want functional as quickly as possible in a new home. Strategic labeling on moving day makes that happen significantly faster.
Label every box from the laundry room with the room name and a brief content description: Laundry — Detergents and Fabric Softener (Upright), Laundry — Hoses and Dryer Accessories, Laundry — Dry Supplies. Keep all laundry room boxes together so they are unloaded into the same area of the new space.
Keep the bag of hoses, cords, and connections with you or clearly separated from the appliances during the move — not taped to the back of the machine where it can fall off in transit. When you arrive at the new home, that bag needs to be immediately accessible so reinstallation can begin.
If your new home requires any different hookup configuration — a different dryer outlet type, a gas connection instead of electric, or a different vent route — arrange for that assessment and any necessary work before moving day so you are not waiting days for the laundry room to become functional.
When to Call Professionals for the Laundry Room
Some parts of a laundry room move are genuinely not DIY tasks. Gas dryer disconnection and reconnection should always be handled by a licensed professional. If your washer or dryer is stacked, a stacking kit removal and reinstallation often requires two people and specific knowledge of the unit — attempting it alone risks dropping an appliance and injury. Large-format front-load machines on pedestals are extremely heavy and awkward to maneuver through doorways without the right equipment and team.
A professional moving team handles appliance moves regularly and arrives with the dollies, straps, and knowledge needed to move washers and dryers safely without damaging floors, doorframes, or the machines themselves. If the laundry room is the part of your move that is making you most nervous, that is a reasonable signal to bring in help.
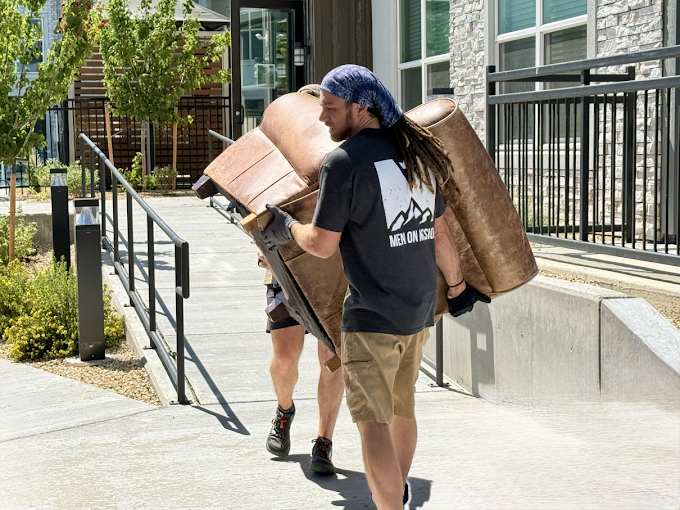
Our team at Men on Mission handles appliance moves as part of full-service relocations throughout the Colorado Springs area. If you want the laundry room — and every other room in your home — handled correctly from start to finish, get a free quote from Men on Mission and we will walk you through exactly what moving day will look like.
Have Questions About Your Move?
Do I need to do anything special to prepare my washer before a move?
Yes. You should run a final empty cycle to flush out water, turn off and disconnect the inlet hoses, drain the hoses completely, and reinstall the shipping bolts in the drum if you have them. Leaving the door slightly open to dry out the interior is also important to prevent mold. Ideally, complete all washer prep the day before moving day — not the morning of.
Can I move a gas dryer myself?
You can move the physical appliance with the help of a moving team, but the gas line disconnection and reconnection must be handled by a licensed professional. Disconnecting a gas line without the proper training and tools is a serious safety hazard. Arrange for a technician to disconnect the gas supply before the movers arrive and to reconnect it once the dryer is in place at the new home.
How do I pack liquid detergent and other laundry supplies so they don't leak?
Tighten caps as firmly as possible, then wrap the cap area with plastic wrap secured with a rubber band. Place each liquid container in a zip-lock bag before boxing it. Pack all liquids upright, never on their sides, and label the box clearly so movers know to keep it upright throughout the move. For bleach, consider using it up or safely disposing of it rather than moving a full bottle.
Should I replace my washer hoses before the move?
If your rubber inlet hoses are more than five years old or show any signs of cracking, bulging, or mineral buildup, a move is a smart time to replace them rather than reinstall aged hoses at the new home. New washer hoses are inexpensive and widely available at hardware stores. Replacing them before the move avoids the risk of a hose failure shortly after you settle in.
What small parts should I be careful not to lose during a laundry room move?
The items most commonly lost in laundry room moves include washer inlet hoses and their fittings, dryer vent duct connectors and clamps, dryer power cords (if they detach from the machine), shipping bolts for the washer drum, lint trap covers, and the contents of pedestal drawers. Collect all of these into clearly labeled zip-lock bags before moving day and keep the bags with you rather than taped to the appliances.