How to Pack a Home Office for Moving Without Losing Your Setup
Packing a home office for a move is more complex than it looks — cables, electronics, and documents all need a specific strategy to arrive intact.
Knowing how to pack a home office for moving is one of the most underestimated challenges in any relocation \u2014 and getting it wrong means spending your first week in the new place hunting for a charging cable, waiting on a replacement monitor stand, or realizing your hard drive stayed behind in a box marked "miscellaneous." Home offices look like a single room, but they contain more individual pieces of critical equipment, tangled wiring, and irreplaceable documents than almost any other space in the house. None of it packs itself, and very little of it forgives sloppy handling. It does not have to go that way.
If you would rather have experienced professionals handle the heavy lifting while you focus on keeping your work running, call our team at 719-357-9048 to lock in your move date.
Whether you work from home full time, keep a small desk for managing household finances, or run a business out of a dedicated room, the strategy below will walk you through every category \u2014 from your desktop tower to your last sticky note \u2014 so your office is back up and running at the new place as quickly as possible.
Why Packing a Home Office Goes Wrong More Often Than It Should
The home office is one of the most logistically complex rooms in any household, and most people do not realize it until they are three hours into packing and still have not found the right box for their monitor. The room looks organized when you work in it, but that organization depends entirely on a web of cables, docking stations, peripherals, and accessories that all need to travel together and arrive together to be usable.
Three specific patterns cause the majority of home office packing failures:
- Treating electronics as just another category \u2014 computers, monitors, printers, and external drives are not the same as books or clothing. They are sensitive to impact, static, and pressure, and they require more than a layer of packing paper to survive a move safely.
- Ignoring cable management \u2014 the cable situation behind a home desk is usually far worse than it looks. Pulling everything out at once without labeling or photographing the setup first produces a pile of identical-looking cables with no obvious destination at the other end.
- Packing documents carelessly \u2014 financial records, contracts, tax documents, and client files are not replaceable in the way a broken picture frame is. A single box of paperwork that gets wet, crushed, or mislabeled can create weeks of administrative problems after the move.
The fix is a methodical room-by-room approach that starts with documentation, works through each equipment category with the right materials, and finishes with a tested checklist before the last box is sealed.
Step One: Document Your Setup Before You Touch Anything
The single most valuable thing you can do before you unplug a single cable is photograph everything. Take wide shots of the full desk setup, close-up shots of the back of your computer tower or docking station showing how each cable is routed, and individual shots of any complex peripheral connections. These photos take less than five minutes and save hours of guesswork when you are rebuilding the setup in a new room.
What to Photograph
At minimum, photograph the back of every device with multiple cable connections \u2014 your desktop tower, your monitor inputs, your printer ports, your router, and your docking station if you use one. If you use a standing desk or a monitor arm, photograph the bracket and mounting hardware before disassembling it. You will not remember which bolt went where, and the photo will.
Label Every Cable Before Unplugging It
Once you have your photos, label each cable before it comes out of the wall or the device. Masking tape and a permanent marker work perfectly. Write the device name and the port \u2014 for example, "monitor HDMI left," "desktop USB hub," or "router ethernet 2." Coil each labeled cable individually and secure it with a twist tie or rubber band. Pack cables for the same device in the same zip-lock bag, and label the bag too. This takes longer than just pulling everything out, but it means your setup is reconnected in thirty minutes instead of three hours.
Step Two: Pack Electronics With the Right Materials
Home office electronics are among the most expensive items in any household and among the most likely to be damaged by inadequate packing. Generic packing paper is not enough for most devices \u2014 you need a combination of anti-static protection, rigid box support, and enough cushioning to absorb the bumps of a moving truck.
Desktop Computers and Towers
The ideal solution for a desktop tower is the original manufacturer's box with the original foam inserts. If you no longer have it, use a box that fits the tower snugly \u2014 not so large that it shifts during transit \u2014 and line the bottom and sides with foam padding or tightly wadded packing paper. Do not use packing peanuts alone; they compress and allow the tower to shift. Wrap the tower itself in an anti-static bag or anti-static bubble wrap before boxing it. Transport the tower upright whenever possible and clearly mark the box "FRAGILE \u2014 THIS SIDE UP."
Monitors
Monitors are vulnerable to pressure on the screen and to flexing of the panel. Original boxes are by far the safest option. If you do not have the original box, wrap the screen in several layers of clean packing paper, then bubble wrap, and place it in a box with at least two inches of cushioning on every side. Pack monitors on their side \u2014 never flat on the panel \u2014 and mark the box clearly. Do not stack anything on top of a monitor box in the truck.
Laptops, Tablets, and Portable Devices
Laptops and tablets should travel in a padded laptop bag or a padded sleeve inside a box, not loose in a larger box with other items. If you have a laptop sleeve, use it. If you do not, wrap the device in a clean towel or several sheets of packing paper and pack it in a box where it cannot shift. Keep laptops and tablets in your personal vehicle rather than the moving truck when possible \u2014 they are small enough to transport yourself and sensitive enough to justify the extra caution.
Printers and Scanners
Before packing a printer, remove the ink or toner cartridges and pack them separately in a sealed zip-lock bag. Cartridges can leak under pressure or temperature change, and ink stains are difficult to remove from packing materials and difficult to explain to a moving crew. Secure any moving parts with tape or foam according to the manufacturer's instructions, then box the printer with padding on all sides.
Step Three: Handle Documents and Files Carefully
Documents are the most replaceable-looking but often least replaceable items in a home office. Tax returns, insurance policies, contracts, medical records, and financial statements can take weeks or months to reconstruct if they are lost or damaged. Moving is one of the highest-risk moments for document loss, and a little structure before packing day prevents a great deal of stress afterward.
Sort Before You Pack
Pull every document out of every drawer, folder, and filing cabinet before you pack anything. Sort into three categories: documents you need to keep permanently, documents you need for the next six months, and documents that are outdated and can be shredded. The shredding pile is usually larger than expected and eliminates a surprising amount of weight and volume. Do not move paper you do not need.
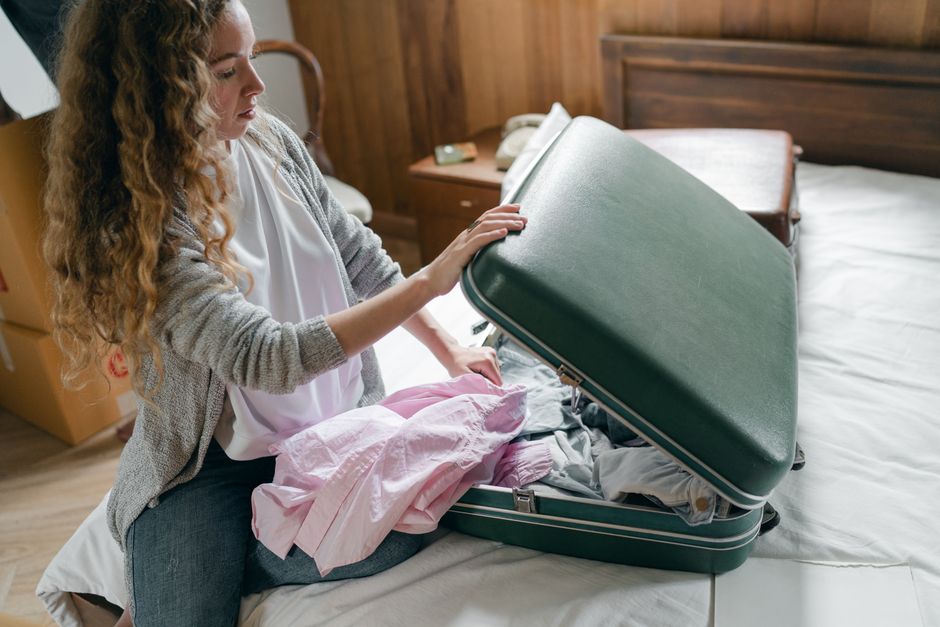
Pack Documents to Survive the Move
Use a dedicated filing box \u2014 the kind with handles and a built-in hanging file rack \u2014 for documents you are keeping. Label the outside clearly and load it last, so it comes off the truck first and goes directly to a secure location in the new home. For truly irreplaceable documents \u2014 birth certificates, passports, original property deeds \u2014 consider transporting them in your personal vehicle rather than the moving truck. A waterproof document bag or a small fireproof box is worth considering for this category.
Step Four: Disassemble and Pack Furniture Strategically
Home office furniture \u2014 desks, shelving units, filing cabinets, and ergonomic chairs \u2014 often requires disassembly before it can move through a doorway. This is not a moving-day discovery you want to make when the crew is standing there waiting. Walk through the office at least a week before the move and identify every piece of furniture that needs to come apart.
Desks
L-shaped and corner desks almost always need to be disassembled to exit a room safely. Even simple desks with attached drawers usually move more safely with the drawers removed. Keep all hardware \u2014 screws, bolts, cam locks \u2014 in a labeled zip-lock bag taped to the underside of the desk or placed in a labeled envelope inside a clearly marked box. Losing the hardware is the single most common reason furniture cannot be reassembled at the destination.
Filing Cabinets
A full filing cabinet can be extremely heavy and awkward to move. If the cabinet has a lock, locate the key before moving day \u2014 not on moving day. Remove the top two or three drawers to reduce weight and prevent the cabinet from tipping during transport. If the cabinet is too heavy to move safely even when emptied, empty it completely and move the drawers separately.
Bookshelves and Storage Units
Remove every item from shelves before the furniture is moved. This sounds obvious, but people routinely attempt to move bookshelves with items still on them, which increases the risk of tipping and damages both the shelf and the contents. Pack books in small boxes \u2014 a standard banker's box is about the right size \u2014 because books are heavier than they look and large boxes full of books are difficult to lift safely.
Step Five: Pack Supplies, Accessories, and the Small Stuff
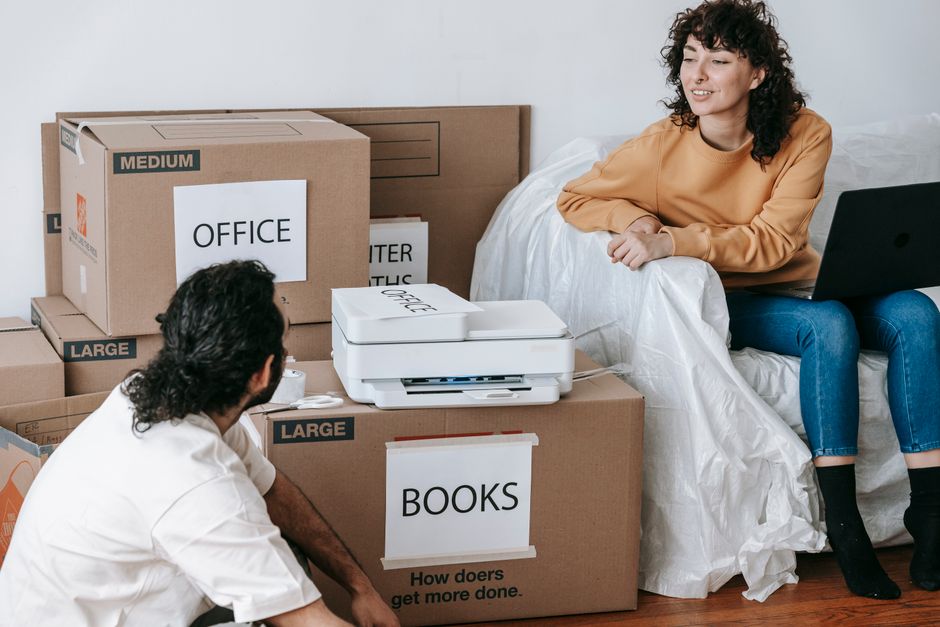
The last category \u2014 and the one most likely to produce an overstuffed "miscellaneous" box \u2014 is the collection of small office supplies, accessories, and day-to-day items that accumulate in every home office. Staplers, tape dispensers, extra ink cartridges, headsets, USB hubs, webcams, desk lamps, paper trays, and the contents of every junk drawer need to be sorted, not scooped.
Group items by function: all writing supplies together, all tech accessories together, all desk organization items together. Pack each group in a small box or bag and label it specifically \u2014 "desk accessories," "tech cables \u2014 monitor," "office supplies." Avoid the temptation to create one large "office miscellaneous" box. Miscellaneous boxes are the ones that sit in a corner of the new office for three months because nobody is sure what is in them or where it belongs.
When the last box is packed, do one final sweep of the room: check every drawer, every shelf, every cable run behind the desk, and every outlet. Home offices have a way of hiding small items \u2014 a USB drive wedged behind a monitor, an external hard drive tucked under a desk, a charger plugged into a power strip \u2014 that are easy to overlook and hard to replace.
Frequently Asked Questions
How far in advance should I start packing my home office before a move?
Start at least one to two weeks before moving day for a dedicated home office. Begin by photographing your setup and labeling cables, then work through electronics, documents, and furniture disassembly in stages. If you work from home full time and cannot afford downtime, keep your essential working setup running until two to three days before the move and pack everything else first.
Do I need special boxes for a home computer or monitor?
Original manufacturer boxes with foam inserts are the safest option for computers and monitors. If you no longer have them, use boxes that fit the device snugly with at least two inches of cushioning on all sides. Wrap monitors in packing paper followed by bubble wrap, and use anti-static bags or anti-static bubble wrap for desktop towers to protect against static discharge during transit.
Should I remove ink cartridges from my printer before moving?
Yes. Ink and toner cartridges should always be removed before packing a printer. Cartridges can leak under pressure or temperature changes during transport, which can damage the printer and surrounding items. Pack cartridges separately in a sealed zip-lock bag and label it clearly so they are easy to find when you set the printer back up.
What is the safest way to move important documents during a relocation?
Pack important documents — tax returns, insurance policies, contracts, passports, and property records — in a dedicated filing box and transport them in your personal vehicle rather than the moving truck when possible. For truly irreplaceable originals, a waterproof document bag or small fireproof box adds an extra layer of protection against water damage or other accidents during transit.
How do I avoid the cable confusion problem when setting up my office at the new place?
The most effective solution is to photograph the back of every device before unplugging anything, then label each cable with masking tape and a marker indicating which device and port it belongs to. Coil each labeled cable individually, bundle cables by device in labeled zip-lock bags, and pack each bag with the device it belongs to. When you arrive at the new place, the photos and labels guide reassembly without any guesswork.
Knowing how to pack a home office for moving is one of the most underestimated challenges in any relocation \u2014 and getting it wrong means spending your first week in the new place hunting for a charging cable, waiting on a replacement monitor stand, or realizing your hard drive stayed behind in a box marked "miscellaneous." Home offices look like a single room, but they contain more individual pieces of critical equipment, tangled wiring, and irreplaceable documents than almost any other space in the house. None of it packs itself, and very little of it forgives sloppy handling. It does not have to go that way.
If you would rather have experienced professionals handle the heavy lifting while you focus on keeping your work running, call our team at 719-357-9048 to lock in your move date.
Whether you work from home full time, keep a small desk for managing household finances, or run a business out of a dedicated room, the strategy below will walk you through every category \u2014 from your desktop tower to your last sticky note \u2014 so your office is back up and running at the new place as quickly as possible.
Why Packing a Home Office Goes Wrong More Often Than It Should
The home office is one of the most logistically complex rooms in any household, and most people do not realize it until they are three hours into packing and still have not found the right box for their monitor. The room looks organized when you work in it, but that organization depends entirely on a web of cables, docking stations, peripherals, and accessories that all need to travel together and arrive together to be usable.
Three specific patterns cause the majority of home office packing failures:
- Treating electronics as just another category \u2014 computers, monitors, printers, and external drives are not the same as books or clothing. They are sensitive to impact, static, and pressure, and they require more than a layer of packing paper to survive a move safely.
- Ignoring cable management \u2014 the cable situation behind a home desk is usually far worse than it looks. Pulling everything out at once without labeling or photographing the setup first produces a pile of identical-looking cables with no obvious destination at the other end.
- Packing documents carelessly \u2014 financial records, contracts, tax documents, and client files are not replaceable in the way a broken picture frame is. A single box of paperwork that gets wet, crushed, or mislabeled can create weeks of administrative problems after the move.
The fix is a methodical room-by-room approach that starts with documentation, works through each equipment category with the right materials, and finishes with a tested checklist before the last box is sealed.
Step One: Document Your Setup Before You Touch Anything
The single most valuable thing you can do before you unplug a single cable is photograph everything. Take wide shots of the full desk setup, close-up shots of the back of your computer tower or docking station showing how each cable is routed, and individual shots of any complex peripheral connections. These photos take less than five minutes and save hours of guesswork when you are rebuilding the setup in a new room.
What to Photograph
At minimum, photograph the back of every device with multiple cable connections \u2014 your desktop tower, your monitor inputs, your printer ports, your router, and your docking station if you use one. If you use a standing desk or a monitor arm, photograph the bracket and mounting hardware before disassembling it. You will not remember which bolt went where, and the photo will.
Label Every Cable Before Unplugging It
Once you have your photos, label each cable before it comes out of the wall or the device. Masking tape and a permanent marker work perfectly. Write the device name and the port \u2014 for example, "monitor HDMI left," "desktop USB hub," or "router ethernet 2." Coil each labeled cable individually and secure it with a twist tie or rubber band. Pack cables for the same device in the same zip-lock bag, and label the bag too. This takes longer than just pulling everything out, but it means your setup is reconnected in thirty minutes instead of three hours.
Step Two: Pack Electronics With the Right Materials
Home office electronics are among the most expensive items in any household and among the most likely to be damaged by inadequate packing. Generic packing paper is not enough for most devices \u2014 you need a combination of anti-static protection, rigid box support, and enough cushioning to absorb the bumps of a moving truck.
Desktop Computers and Towers
The ideal solution for a desktop tower is the original manufacturer's box with the original foam inserts. If you no longer have it, use a box that fits the tower snugly \u2014 not so large that it shifts during transit \u2014 and line the bottom and sides with foam padding or tightly wadded packing paper. Do not use packing peanuts alone; they compress and allow the tower to shift. Wrap the tower itself in an anti-static bag or anti-static bubble wrap before boxing it. Transport the tower upright whenever possible and clearly mark the box "FRAGILE \u2014 THIS SIDE UP."
Monitors
Monitors are vulnerable to pressure on the screen and to flexing of the panel. Original boxes are by far the safest option. If you do not have the original box, wrap the screen in several layers of clean packing paper, then bubble wrap, and place it in a box with at least two inches of cushioning on every side. Pack monitors on their side \u2014 never flat on the panel \u2014 and mark the box clearly. Do not stack anything on top of a monitor box in the truck.
Laptops, Tablets, and Portable Devices
Laptops and tablets should travel in a padded laptop bag or a padded sleeve inside a box, not loose in a larger box with other items. If you have a laptop sleeve, use it. If you do not, wrap the device in a clean towel or several sheets of packing paper and pack it in a box where it cannot shift. Keep laptops and tablets in your personal vehicle rather than the moving truck when possible \u2014 they are small enough to transport yourself and sensitive enough to justify the extra caution.
Printers and Scanners
Before packing a printer, remove the ink or toner cartridges and pack them separately in a sealed zip-lock bag. Cartridges can leak under pressure or temperature change, and ink stains are difficult to remove from packing materials and difficult to explain to a moving crew. Secure any moving parts with tape or foam according to the manufacturer's instructions, then box the printer with padding on all sides.
Step Three: Handle Documents and Files Carefully
Documents are the most replaceable-looking but often least replaceable items in a home office. Tax returns, insurance policies, contracts, medical records, and financial statements can take weeks or months to reconstruct if they are lost or damaged. Moving is one of the highest-risk moments for document loss, and a little structure before packing day prevents a great deal of stress afterward.
Sort Before You Pack
Pull every document out of every drawer, folder, and filing cabinet before you pack anything. Sort into three categories: documents you need to keep permanently, documents you need for the next six months, and documents that are outdated and can be shredded. The shredding pile is usually larger than expected and eliminates a surprising amount of weight and volume. Do not move paper you do not need.
Pack Documents to Survive the Move
Use a dedicated filing box \u2014 the kind with handles and a built-in hanging file rack \u2014 for documents you are keeping. Label the outside clearly and load it last, so it comes off the truck first and goes directly to a secure location in the new home. For truly irreplaceable documents \u2014 birth certificates, passports, original property deeds \u2014 consider transporting them in your personal vehicle rather than the moving truck. A waterproof document bag or a small fireproof box is worth considering for this category.
Step Four: Disassemble and Pack Furniture Strategically
Home office furniture \u2014 desks, shelving units, filing cabinets, and ergonomic chairs \u2014 often requires disassembly before it can move through a doorway. This is not a moving-day discovery you want to make when the crew is standing there waiting. Walk through the office at least a week before the move and identify every piece of furniture that needs to come apart.
Desks
L-shaped and corner desks almost always need to be disassembled to exit a room safely. Even simple desks with attached drawers usually move more safely with the drawers removed. Keep all hardware \u2014 screws, bolts, cam locks \u2014 in a labeled zip-lock bag taped to the underside of the desk or placed in a labeled envelope inside a clearly marked box. Losing the hardware is the single most common reason furniture cannot be reassembled at the destination.
Filing Cabinets
A full filing cabinet can be extremely heavy and awkward to move. If the cabinet has a lock, locate the key before moving day \u2014 not on moving day. Remove the top two or three drawers to reduce weight and prevent the cabinet from tipping during transport. If the cabinet is too heavy to move safely even when emptied, empty it completely and move the drawers separately.
Bookshelves and Storage Units
Remove every item from shelves before the furniture is moved. This sounds obvious, but people routinely attempt to move bookshelves with items still on them, which increases the risk of tipping and damages both the shelf and the contents. Pack books in small boxes \u2014 a standard banker's box is about the right size \u2014 because books are heavier than they look and large boxes full of books are difficult to lift safely.
Step Five: Pack Supplies, Accessories, and the Small Stuff
The last category \u2014 and the one most likely to produce an overstuffed "miscellaneous" box \u2014 is the collection of small office supplies, accessories, and day-to-day items that accumulate in every home office. Staplers, tape dispensers, extra ink cartridges, headsets, USB hubs, webcams, desk lamps, paper trays, and the contents of every junk drawer need to be sorted, not scooped.
Group items by function: all writing supplies together, all tech accessories together, all desk organization items together. Pack each group in a small box or bag and label it specifically \u2014 "desk accessories," "tech cables \u2014 monitor," "office supplies." Avoid the temptation to create one large "office miscellaneous" box. Miscellaneous boxes are the ones that sit in a corner of the new office for three months because nobody is sure what is in them or where it belongs.
When the last box is packed, do one final sweep of the room: check every drawer, every shelf, every cable run behind the desk, and every outlet. Home offices have a way of hiding small items \u2014 a USB drive wedged behind a monitor, an external hard drive tucked under a desk, a charger plugged into a power strip \u2014 that are easy to overlook and hard to replace.
Have Questions About Your Move?
How far in advance should I start packing my home office before a move?
Start at least one to two weeks before moving day for a dedicated home office. Begin by photographing your setup and labeling cables, then work through electronics, documents, and furniture disassembly in stages. If you work from home full time and cannot afford downtime, keep your essential working setup running until two to three days before the move and pack everything else first.
Do I need special boxes for a home computer or monitor?
Original manufacturer boxes with foam inserts are the safest option for computers and monitors. If you no longer have them, use boxes that fit the device snugly with at least two inches of cushioning on all sides. Wrap monitors in packing paper followed by bubble wrap, and use anti-static bags or anti-static bubble wrap for desktop towers to protect against static discharge during transit.
Should I remove ink cartridges from my printer before moving?
Yes. Ink and toner cartridges should always be removed before packing a printer. Cartridges can leak under pressure or temperature changes during transport, which can damage the printer and surrounding items. Pack cartridges separately in a sealed zip-lock bag and label it clearly so they are easy to find when you set the printer back up.
What is the safest way to move important documents during a relocation?
Pack important documents — tax returns, insurance policies, contracts, passports, and property records — in a dedicated filing box and transport them in your personal vehicle rather than the moving truck when possible. For truly irreplaceable originals, a waterproof document bag or small fireproof box adds an extra layer of protection against water damage or other accidents during transit.
How do I avoid the cable confusion problem when setting up my office at the new place?
The most effective solution is to photograph the back of every device before unplugging anything, then label each cable with masking tape and a marker indicating which device and port it belongs to. Coil each labeled cable individually, bundle cables by device in labeled zip-lock bags, and pack each bag with the device it belongs to. When you arrive at the new place, the photos and labels guide reassembly without any guesswork.