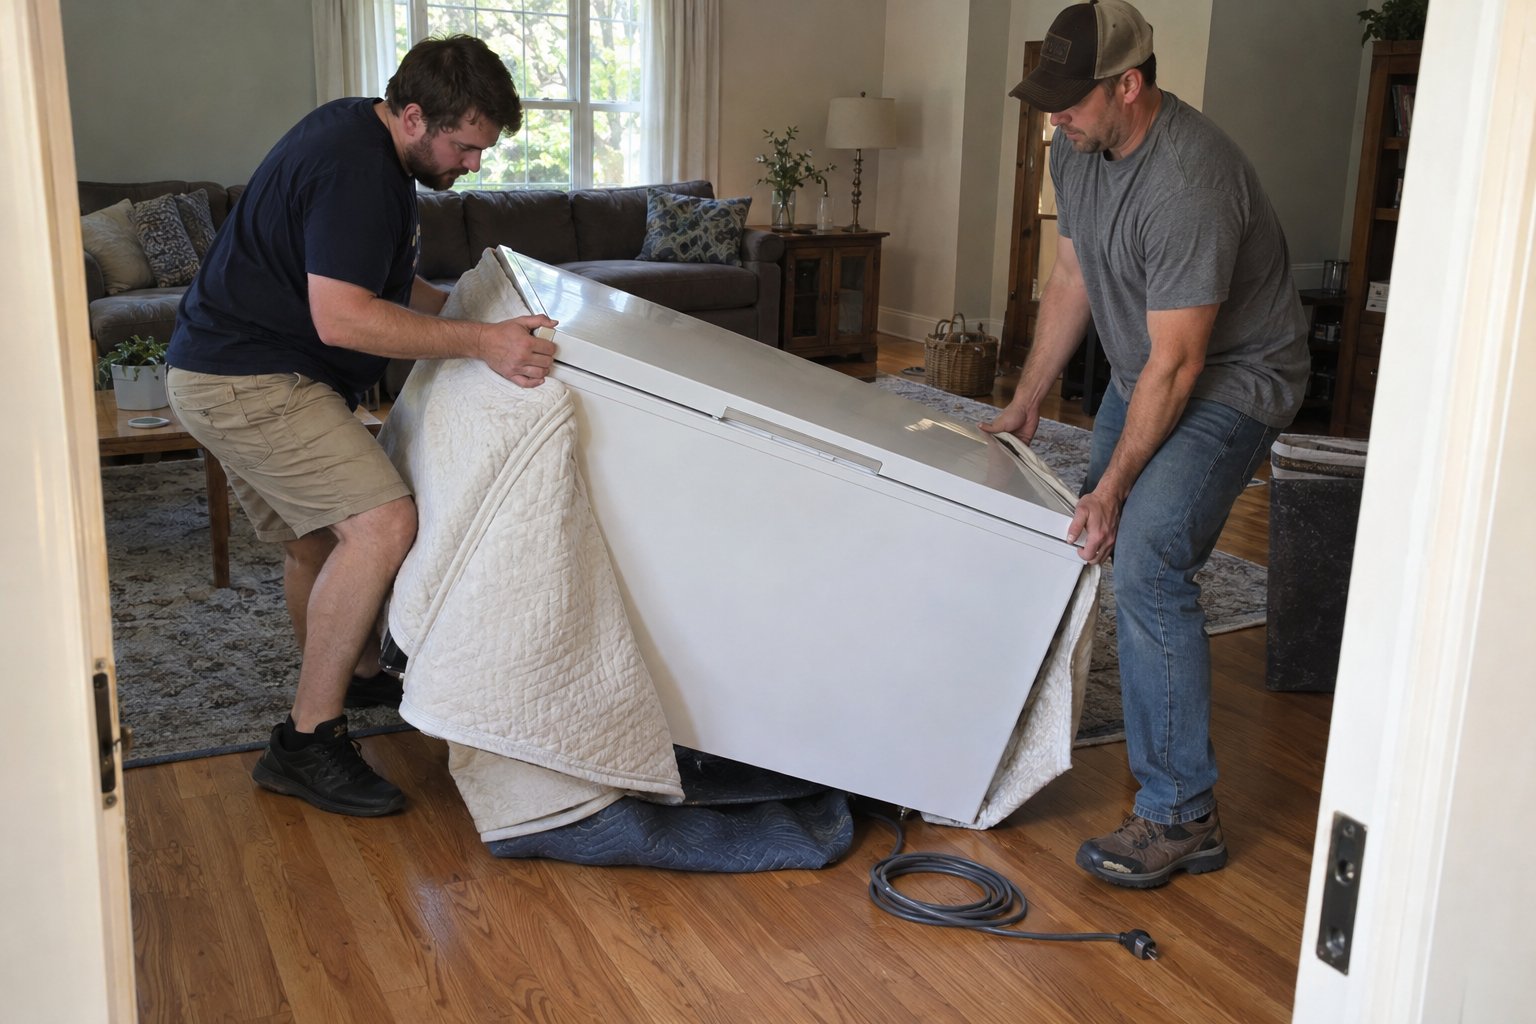
Avoid These Common Utility Room Packing Mistakes
Learn how to pack a utility room for moving — covering hazardous materials, tools, equipment, and storage so nothing gets left behind or packed unsafely.
Knowing how to pack a utility room for moving is one of those tasks that almost everyone gets wrong \u2014 not because the room is complicated, but because it never feels urgent. The utility room sits at the edge of your mental floor plan, filled with items that seem too miscellaneous to sort and too awkward to box. It is the room that holds everything from water heater supplies and electrical panels to seasonal decorations and mystery cords that you have been meaning to deal with for three years. Then moving week arrives and it is still untouched. It does not have to go that way.
If you would rather have experienced professionals handle the heavy lifting while you focus on keeping your household running, call our team at 719-357-9048 to lock in your move date.
Whether your utility room is a proper dedicated space with shelving units and a utility sink, a converted hallway closet housing your HVAC equipment and cleaning supplies, or a mechanical room tucked behind the garage \u2014 the strategy below will walk you through every category, from your heaviest equipment to the smallest fastener jar on the back shelf, so everything arrives safely, accounted for, and ready to find its place in your new home.
Why Packing a Utility Room Goes Wrong More Often Than It Should
The utility room is one of the most consistently overlooked spaces in any household move. It is not a living space, it does not photograph well for listings, and it tends to absorb the overflow from every other room in the house. People assume that because it is already somewhat chaotic, any packing approach will do \u2014 and that assumption leads directly to problems on moving day.
Three specific patterns cause the majority of utility room packing failures:
- Treating it as the last-priority room \u2014 Because the utility room does not feel like a "real" room, it gets scheduled last. That means it often gets packed in the final two hours before the truck arrives, when energy is low, supplies are running out, and there is no time to sort, label, or protect anything properly. Items get tossed into whatever boxes remain and arrive at the new home as an unmanageable pile of mystery.
- Ignoring hazardous materials \u2014 Utility rooms are among the most common storage locations for items that cannot legally or safely travel in a moving truck: aerosol cans, paint cans, cleaning solvents, pesticides, propane canisters, motor oil, and more. Packing these without thinking leads to leaks, fumes, and \u2014 in the worst cases \u2014 genuine safety hazards in a sealed truck.
- Failing to account for fixed or semi-fixed equipment \u2014 Water softeners, sump pump setups, whole-house humidifiers, and similar systems require preparation steps before they can be disconnected. People often assume these are the moving company's responsibility, skip the prep work, and end up with rushed disconnections on moving day that damage the equipment or leave water behind.
The solution is to treat your utility room like a logistics challenge \u2014 not a catch-all dump zone \u2014 and begin working through it at least a week before your move date. A structured, category-by-category approach turns an intimidating space into a manageable one.
Step One: Do a Full Inventory Before You Touch Anything
Walk into your utility room with a notepad or your phone and do nothing but look for the first few minutes. Your goal is to understand what you are dealing with before you commit to any packing approach. Utility rooms tend to contain a surprising variety of item categories packed into a small space, and knowing what you have makes it possible to prioritize and plan.
As you take stock, mentally sort items into four buckets:
- Things that need prep work before packing \u2014 equipment that must be drained, disconnected, or cleaned before it can move safely.
- Things that cannot go on the truck at all \u2014 hazardous materials that require special disposal or separate transport.
- Things you are keeping and can pack normally \u2014 tools, hardware, cleaning supplies in safe containers, stored items.
- Things worth reconsidering \u2014 duplicate items, broken tools, expired products, and anything you have not used in years.
This inventory step takes twenty to thirty minutes and saves hours of confusion later. Do not skip it.
How to Handle Hazardous Materials the Right Way
This is the most important section of this guide. Utility rooms are disproportionately likely to contain hazardous materials, and moving companies \u2014 including ours \u2014 cannot transport many of them on a standard moving truck. Attempting to sneak them into boxes is not only against most moving contracts, it is a genuine safety risk to every person who handles that truck.
Common utility room items that cannot travel in a moving truck
- Paint cans, stains, and varnishes (especially if still liquid)
- Aerosol cans of any kind (spray paint, lubricants, insecticides)
- Propane tanks and camping fuel canisters
- Motor oil, transmission fluid, and automotive chemicals
- Pool chemicals, bleach in large quantities, and ammonia-based products
- Pesticides and herbicides
- Batteries in bulk (especially lithium-ion)
- Fertilizers with hazardous ingredient lists
What to do with these items before your move
Start this process at least two weeks before your move date, because some disposal options require lead time. Most municipalities run household hazardous waste (HHW) drop-off events or maintain permanent collection sites. Paint can often be donated to community organizations, local theaters, or Habitat for Humanity ReStores. Propane tanks can sometimes be exchanged at hardware stores. Check your local waste management authority for specifics \u2014 and do not simply throw these items in the trash, as many are illegal to dispose of that way.
Cleaning products that are water-based, non-aerosol, and have no hazardous ingredient warnings can typically travel safely if they are tightly sealed and packed upright in a clearly labeled box. When in doubt, contact your moving company directly and ask.
Packing Tools, Hardware, and Equipment
Once you have sorted out your hazardous materials, the rest of the utility room becomes a more familiar packing challenge: a lot of heavy, oddly shaped items that need protection and clear labeling.
Hand tools and power tools
Hand tools \u2014 wrenches, screwdrivers, hammers, pliers \u2014 pack best in tool rolls, tool belts, or a dedicated tool chest if you already own one. If you are boxing them loose, wrap sharp or pointed tools individually in packing paper and pack them blade-down or tip-in to reduce puncture risk. Power tools should be packed in their original cases when possible, which also keeps accessories, bits, and chargers together. If original cases are long gone, wrap the tool body in moving blankets or heavy packing paper and pack each tool individually rather than stacking them.
Hardware jars and small fasteners
Jars of screws, nails, anchors, and assorted fasteners should be packed upright, lidded tightly, and grouped together in a single box. Label the box clearly. These items are easy to scatter and nearly impossible to reassemble once they end up mixed together. If you have loose hardware sitting in trays or drawer organizers, take a photo before packing so you can remember the organizational system that worked.
Utility shelving and storage units
Freestanding shelving units in a utility room are usually simple enough to disassemble \u2014 remove the shelves, bag the bolts and connectors in a labeled zip-lock bag, and tape that bag to the shelving frame before wrapping it. Fixed shelving that is wall-mounted will stay with the home unless you have made arrangements to take it, in which case schedule that removal with enough time to patch and paint any wall damage before closing.
Equipment that needs draining or disconnecting
Water softeners, sump pumps, whole-house filters, and similar systems should be shut down and drained before your move date \u2014 not on moving day. Consult your owner's manual or contact the manufacturer for the correct shutdown procedure. If you are unsure, a plumber can typically handle this in under an hour and the cost is well worth avoiding a water-damaged truck or damaged equipment. Keep any maintenance records, filter specs, or warranty documents in a folder in your essentials bag, not packed away in a box.
Packing the General Storage Contents of a Utility Room
Beyond tools and equipment, most utility rooms accumulate general household overflow: seasonal decorations, extra paper goods, cleaning supply backstock, spare lightbulbs, extension cords, and items that have nowhere else to live. Packing this category well comes down to a few consistent habits.
Label boxes by contents and destination \u2014 not just "utility room"
Writing "utility room" on every box from this space is the fastest way to create unpacking confusion in your new home. Instead, label boxes by what is actually inside: "hand tools \u2014 utility room," "cleaning supplies \u2014 utility room," "holiday decor \u2014 storage." If you know where items are going in the new home, add that too. The more specific your labels, the faster your unpacking goes.
Pack heavy items in small boxes
This rule applies everywhere but is especially easy to violate in a utility room, where heavy items are everywhere. A large box filled with tools or hardware becomes nearly impossible to lift safely. Use small, sturdy boxes for anything dense and heavy, and keep lighter items \u2014 cleaning supplies, extension cords, paper goods \u2014 in larger boxes.
Keep a moving day essentials kit accessible
Your utility room likely contains items you will need on moving day itself: a box cutter, a screwdriver set, work gloves, a flashlight, extra batteries, and possibly a basic first aid kit. Set these aside in a clearly marked bag or bin before you start packing everything else. You do not want to be digging through sealed boxes looking for a screwdriver when you need to disassemble something at the last minute.
The Final Walk-Through: What Most People Miss
When you think the utility room is fully packed, do one more sweep with a flashlight and a critical eye. Utility rooms have a way of hiding things \u2014 items tucked behind the water heater, tools hanging on pegboard that blends into the wall, cords draped over pipes, small items stored on top of cabinets above eye level.
Check every shelf, including the top ones. Open every cabinet door. Look behind and beneath every piece of equipment. Check the floor drain area if your utility room has one. Look at the wall-mounted items: shelves, pegboards, fire extinguishers, smoke detectors, electrical panels, and circuit breaker labels (photograph these before you leave \u2014 they are useful for understanding your new home's electrical setup).
A thorough final walk-through takes ten minutes and is the difference between arriving at your new home with everything you need and spending the first week realizing what you left behind.
If the idea of coordinating all of this while managing the rest of your move feels overwhelming, that is exactly what our team is here for. We handle the physical work so you can focus on the hundred other decisions a move requires. Call us at 719-357-9048 or get a free moving quote and we will walk you through what we can take off your plate.
Frequently Asked Questions
Can movers transport the contents of a utility room?
Most items in a utility room can be transported by professional movers — tools, hardware, equipment, and general storage items are all fair game. The exception is hazardous materials: aerosol cans, paint cans, propane tanks, motor oil, pesticides, and similar items cannot legally or safely travel in a standard moving truck. Sort these out early and dispose of or transport them separately before your move date.
How far in advance should I start packing a utility room?
Start at least one week before your move date, and give yourself two weeks if your utility room is large or contains equipment that needs draining and disconnecting. Hazardous material disposal in particular requires lead time — some municipal drop-off events only happen on certain days, and you do not want to be scrambling the day before the truck arrives.
Do I need to drain my water softener or sump pump before the movers arrive?
Yes. Any water-containing equipment — water softeners, sump pumps, whole-house filters, and similar systems — should be properly shut down and drained before moving day. Do not leave this for the movers to handle on the spot. Consult your owner's manual or hire a plumber to do this in advance. Moving wet equipment risks water damage to the truck, other belongings, and the equipment itself.
What is the best way to pack loose hardware like screws and nails from a utility room?
Keep them in their original jars or containers with lids tightly closed, and pack all hardware containers together in a single labeled box. If hardware is loose, use small zip-lock bags and label each one before dropping them into a box. Take a photo of any organized tray or drawer organizer before packing it so you can recreate the system in your new home.
Should I disassemble shelving in my utility room before the movers come?
For freestanding shelving units, yes — disassembling them before the movers arrive makes loading significantly faster and safer. Remove each shelf, bag and label all hardware, and tape the hardware bag to the frame. For wall-mounted shelving you plan to take with you, remove it in advance and patch any wall damage before your move-out date. Leave built-in or fixed shelving that belongs to the property.
Knowing how to pack a utility room for moving is one of those tasks that almost everyone gets wrong \u2014 not because the room is complicated, but because it never feels urgent. The utility room sits at the edge of your mental floor plan, filled with items that seem too miscellaneous to sort and too awkward to box. It is the room that holds everything from water heater supplies and electrical panels to seasonal decorations and mystery cords that you have been meaning to deal with for three years. Then moving week arrives and it is still untouched. It does not have to go that way.
If you would rather have experienced professionals handle the heavy lifting while you focus on keeping your household running, call our team at 719-357-9048 to lock in your move date.
Whether your utility room is a proper dedicated space with shelving units and a utility sink, a converted hallway closet housing your HVAC equipment and cleaning supplies, or a mechanical room tucked behind the garage \u2014 the strategy below will walk you through every category, from your heaviest equipment to the smallest fastener jar on the back shelf, so everything arrives safely, accounted for, and ready to find its place in your new home.
Why Packing a Utility Room Goes Wrong More Often Than It Should
The utility room is one of the most consistently overlooked spaces in any household move. It is not a living space, it does not photograph well for listings, and it tends to absorb the overflow from every other room in the house. People assume that because it is already somewhat chaotic, any packing approach will do \u2014 and that assumption leads directly to problems on moving day.
Three specific patterns cause the majority of utility room packing failures:
- Treating it as the last-priority room \u2014 Because the utility room does not feel like a "real" room, it gets scheduled last. That means it often gets packed in the final two hours before the truck arrives, when energy is low, supplies are running out, and there is no time to sort, label, or protect anything properly. Items get tossed into whatever boxes remain and arrive at the new home as an unmanageable pile of mystery.
- Ignoring hazardous materials \u2014 Utility rooms are among the most common storage locations for items that cannot legally or safely travel in a moving truck: aerosol cans, paint cans, cleaning solvents, pesticides, propane canisters, motor oil, and more. Packing these without thinking leads to leaks, fumes, and \u2014 in the worst cases \u2014 genuine safety hazards in a sealed truck.
- Failing to account for fixed or semi-fixed equipment \u2014 Water softeners, sump pump setups, whole-house humidifiers, and similar systems require preparation steps before they can be disconnected. People often assume these are the moving company's responsibility, skip the prep work, and end up with rushed disconnections on moving day that damage the equipment or leave water behind.
The solution is to treat your utility room like a logistics challenge \u2014 not a catch-all dump zone \u2014 and begin working through it at least a week before your move date. A structured, category-by-category approach turns an intimidating space into a manageable one.
Step One: Do a Full Inventory Before You Touch Anything
Walk into your utility room with a notepad or your phone and do nothing but look for the first few minutes. Your goal is to understand what you are dealing with before you commit to any packing approach. Utility rooms tend to contain a surprising variety of item categories packed into a small space, and knowing what you have makes it possible to prioritize and plan.
As you take stock, mentally sort items into four buckets:
- Things that need prep work before packing \u2014 equipment that must be drained, disconnected, or cleaned before it can move safely.
- Things that cannot go on the truck at all \u2014 hazardous materials that require special disposal or separate transport.
- Things you are keeping and can pack normally \u2014 tools, hardware, cleaning supplies in safe containers, stored items.
- Things worth reconsidering \u2014 duplicate items, broken tools, expired products, and anything you have not used in years.
This inventory step takes twenty to thirty minutes and saves hours of confusion later. Do not skip it.
How to Handle Hazardous Materials the Right Way
This is the most important section of this guide. Utility rooms are disproportionately likely to contain hazardous materials, and moving companies \u2014 including ours \u2014 cannot transport many of them on a standard moving truck. Attempting to sneak them into boxes is not only against most moving contracts, it is a genuine safety risk to every person who handles that truck.
Common utility room items that cannot travel in a moving truck
- Paint cans, stains, and varnishes (especially if still liquid)
- Aerosol cans of any kind (spray paint, lubricants, insecticides)
- Propane tanks and camping fuel canisters
- Motor oil, transmission fluid, and automotive chemicals
- Pool chemicals, bleach in large quantities, and ammonia-based products
- Pesticides and herbicides
- Batteries in bulk (especially lithium-ion)
- Fertilizers with hazardous ingredient lists
What to do with these items before your move
Start this process at least two weeks before your move date, because some disposal options require lead time. Most municipalities run household hazardous waste (HHW) drop-off events or maintain permanent collection sites. Paint can often be donated to community organizations, local theaters, or Habitat for Humanity ReStores. Propane tanks can sometimes be exchanged at hardware stores. Check your local waste management authority for specifics \u2014 and do not simply throw these items in the trash, as many are illegal to dispose of that way.
Cleaning products that are water-based, non-aerosol, and have no hazardous ingredient warnings can typically travel safely if they are tightly sealed and packed upright in a clearly labeled box. When in doubt, contact your moving company directly and ask.
Packing Tools, Hardware, and Equipment
Once you have sorted out your hazardous materials, the rest of the utility room becomes a more familiar packing challenge: a lot of heavy, oddly shaped items that need protection and clear labeling.
Hand tools and power tools
Hand tools \u2014 wrenches, screwdrivers, hammers, pliers \u2014 pack best in tool rolls, tool belts, or a dedicated tool chest if you already own one. If you are boxing them loose, wrap sharp or pointed tools individually in packing paper and pack them blade-down or tip-in to reduce puncture risk. Power tools should be packed in their original cases when possible, which also keeps accessories, bits, and chargers together. If original cases are long gone, wrap the tool body in moving blankets or heavy packing paper and pack each tool individually rather than stacking them.
Hardware jars and small fasteners
Jars of screws, nails, anchors, and assorted fasteners should be packed upright, lidded tightly, and grouped together in a single box. Label the box clearly. These items are easy to scatter and nearly impossible to reassemble once they end up mixed together. If you have loose hardware sitting in trays or drawer organizers, take a photo before packing so you can remember the organizational system that worked.
Utility shelving and storage units
Freestanding shelving units in a utility room are usually simple enough to disassemble \u2014 remove the shelves, bag the bolts and connectors in a labeled zip-lock bag, and tape that bag to the shelving frame before wrapping it. Fixed shelving that is wall-mounted will stay with the home unless you have made arrangements to take it, in which case schedule that removal with enough time to patch and paint any wall damage before closing.
Equipment that needs draining or disconnecting
Water softeners, sump pumps, whole-house filters, and similar systems should be shut down and drained before your move date \u2014 not on moving day. Consult your owner's manual or contact the manufacturer for the correct shutdown procedure. If you are unsure, a plumber can typically handle this in under an hour and the cost is well worth avoiding a water-damaged truck or damaged equipment. Keep any maintenance records, filter specs, or warranty documents in a folder in your essentials bag, not packed away in a box.
Packing the General Storage Contents of a Utility Room
Beyond tools and equipment, most utility rooms accumulate general household overflow: seasonal decorations, extra paper goods, cleaning supply backstock, spare lightbulbs, extension cords, and items that have nowhere else to live. Packing this category well comes down to a few consistent habits.
Label boxes by contents and destination \u2014 not just "utility room"
Writing "utility room" on every box from this space is the fastest way to create unpacking confusion in your new home. Instead, label boxes by what is actually inside: "hand tools \u2014 utility room," "cleaning supplies \u2014 utility room," "holiday decor \u2014 storage." If you know where items are going in the new home, add that too. The more specific your labels, the faster your unpacking goes.
Pack heavy items in small boxes
This rule applies everywhere but is especially easy to violate in a utility room, where heavy items are everywhere. A large box filled with tools or hardware becomes nearly impossible to lift safely. Use small, sturdy boxes for anything dense and heavy, and keep lighter items \u2014 cleaning supplies, extension cords, paper goods \u2014 in larger boxes.
Keep a moving day essentials kit accessible
Your utility room likely contains items you will need on moving day itself: a box cutter, a screwdriver set, work gloves, a flashlight, extra batteries, and possibly a basic first aid kit. Set these aside in a clearly marked bag or bin before you start packing everything else. You do not want to be digging through sealed boxes looking for a screwdriver when you need to disassemble something at the last minute.
The Final Walk-Through: What Most People Miss
When you think the utility room is fully packed, do one more sweep with a flashlight and a critical eye. Utility rooms have a way of hiding things \u2014 items tucked behind the water heater, tools hanging on pegboard that blends into the wall, cords draped over pipes, small items stored on top of cabinets above eye level.
Check every shelf, including the top ones. Open every cabinet door. Look behind and beneath every piece of equipment. Check the floor drain area if your utility room has one. Look at the wall-mounted items: shelves, pegboards, fire extinguishers, smoke detectors, electrical panels, and circuit breaker labels (photograph these before you leave \u2014 they are useful for understanding your new home's electrical setup).
A thorough final walk-through takes ten minutes and is the difference between arriving at your new home with everything you need and spending the first week realizing what you left behind.
If the idea of coordinating all of this while managing the rest of your move feels overwhelming, that is exactly what our team is here for. We handle the physical work so you can focus on the hundred other decisions a move requires. Call us at 719-357-9048 or get a free moving quote and we will walk you through what we can take off your plate.
Have Questions About Your Move?
Can movers transport the contents of a utility room?
Most items in a utility room can be transported by professional movers — tools, hardware, equipment, and general storage items are all fair game. The exception is hazardous materials: aerosol cans, paint cans, propane tanks, motor oil, pesticides, and similar items cannot legally or safely travel in a standard moving truck. Sort these out early and dispose of or transport them separately before your move date.
How far in advance should I start packing a utility room?
Start at least one week before your move date, and give yourself two weeks if your utility room is large or contains equipment that needs draining and disconnecting. Hazardous material disposal in particular requires lead time — some municipal drop-off events only happen on certain days, and you do not want to be scrambling the day before the truck arrives.
Do I need to drain my water softener or sump pump before the movers arrive?
Yes. Any water-containing equipment — water softeners, sump pumps, whole-house filters, and similar systems — should be properly shut down and drained before moving day. Do not leave this for the movers to handle on the spot. Consult your owner's manual or hire a plumber to do this in advance. Moving wet equipment risks water damage to the truck, other belongings, and the equipment itself.
What is the best way to pack loose hardware like screws and nails from a utility room?
Keep them in their original jars or containers with lids tightly closed, and pack all hardware containers together in a single labeled box. If hardware is loose, use small zip-lock bags and label each one before dropping them into a box. Take a photo of any organized tray or drawer organizer before packing it so you can recreate the system in your new home.
Should I disassemble shelving in my utility room before the movers come?
For freestanding shelving units, yes — disassembling them before the movers arrive makes loading significantly faster and safer. Remove each shelf, bag and label all hardware, and tape the hardware bag to the frame. For wall-mounted shelving you plan to take with you, remove it in advance and patch any wall damage before your move-out date. Leave built-in or fixed shelving that belongs to the property.