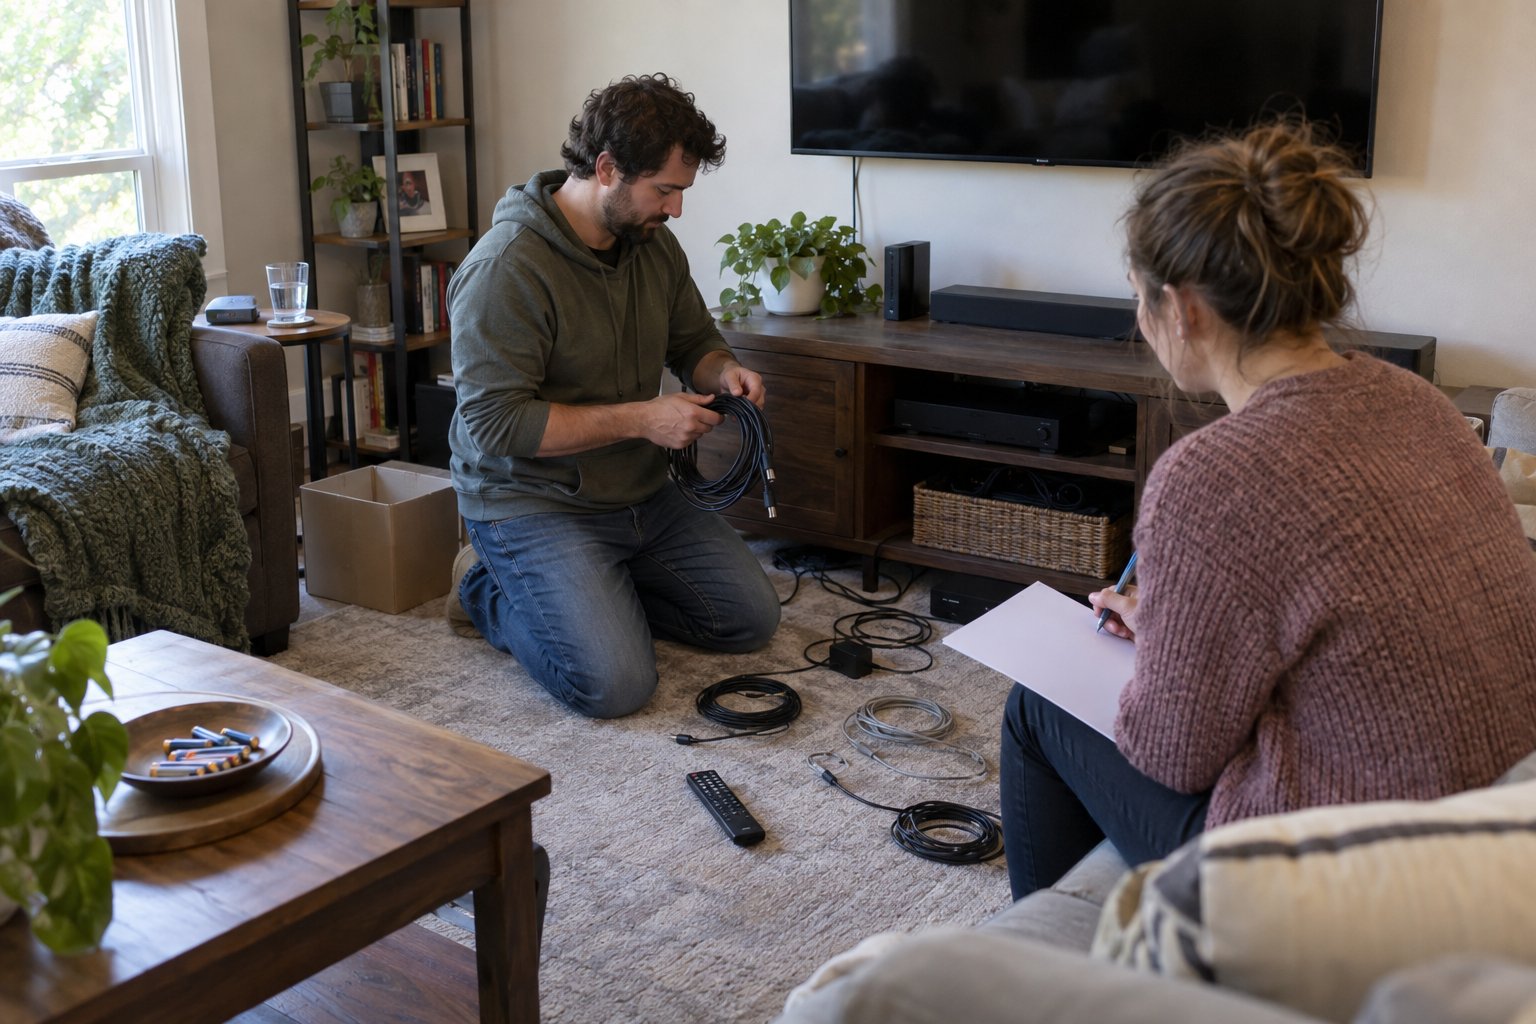
How to pack home theater cables and remotes for moving comes down to one habit most people skip: documenting every connection before you touch a single cord. Take a photo of the back of each device, then label both ends of every cable with what it connects and where. Group remotes with their matching devices in clearly marked bags, and you will reconnect your setup in under an hour instead of spending a weekend untangling a mystery pile of cords.
Everyone who has moved a home theater system knows the real pain is rarely the TV itself. It is the shoebox of identical black cables, the universal remote with no visible markings, and the receiver with eight inputs you can no longer remember by heart. This guide focuses specifically on that tangle: how to document, label, bag, and transport the small connective pieces that make your entertainment system actually work, so setup day does not turn into a troubleshooting session.
Why Cables and Remotes Cause More Trouble Than the Electronics Themselves
Cables and remotes go wrong more often than TVs or speakers because they are small, visually similar, and easy to toss into a junk box without a system. A cracked screen is obvious and preventable with padding. A missing HDMI cable or a remote that ended up in a kitchen box is a quieter problem, and it does not surface until you are trying to watch something that night.
Most home theater setups accumulate a surprising number of cords over the years: power cables, HDMI, optical audio, speaker wire, Ethernet, and whatever proprietary cord came with a soundbar or streaming device. None of them are intuitive to sort once they are unplugged, which is exactly why a labeling system matters more here than almost anywhere else in the house.
How Do You Document a Home Theater Setup Before Disconnecting Anything?
Document the setup by photographing the back of every device before you unplug a single cable. Wide shots and close-ups of each port in use give you a visual reference you can check against later, which removes the guesswork entirely.
Take Photos From Multiple Angles
Start with one wide photo showing how all the components sit relative to each other. Then take a close-up of the back of each device, making sure the labels on the ports (HDMI 1, HDMI 2, Optical, and so on) are legible in the shot. If your receiver or soundbar has a settings menu showing input names, photograph that too.
Note Any Custom Settings
If you have renamed inputs on your TV or receiver, or set up a specific sound profile, jot those down in your phone's notes app. Small customizations like these are easy to forget and tedious to redo from scratch.
What Is the Best Way to Label Cables for Moving?
The best way to label cables is to tag both ends of every cord with masking tape or cable flags, writing what the cable is and what it connects to on each end. Labeling only one end leaves you guessing once the cable is coiled up with a dozen others.
Use a Simple Naming System
Something like "TV to Soundbar (Optical)" or "Receiver HDMI 2 to TV" is specific enough to be useful without overcomplicating things. Avoid vague labels like "cable 3," which will mean nothing once everything is unplugged.
Coil and Secure Each Cable Separately
Loosely coil each cable and secure it with a twist tie or velcro strap rather than letting cords tangle loose in a box. A tangled mass of cables takes far longer to sort through than a bin of neatly coiled, labeled cords.
How Should You Pack Remotes So None Go Missing?
Pack each remote in its own labeled sandwich bag along with any batteries, then group those bags together in a single small box or pouch dedicated entirely to remotes. Remotes are small enough to get buried in a junk drawer or tossed into a random box, which is how most of them go missing during a move.
Remove Batteries for Longer Moves
If your move involves storage or a multi-day transit, remove batteries from remotes to prevent corrosion from a leak ruining the contacts. Keep the batteries in the same bag so you are not hunting for replacements later.
Keep the Remote Bag With You, Not on the Truck
Because remotes are small and easy to overlook in a sea of boxes, consider keeping this bag in a personal bag or your vehicle rather than loading it with everything else. It is one less thing to search for on the other end.
How Do You Pack Cables and Small Accessories for the Move Itself?
Pack cables and accessories in a single clear bin or a few labeled boxes kept separate from general household items, rather than scattered across multiple boxes. Clear bins let you see contents at a glance, which saves time during both packing and unpacking.
Group by Device, Not by Cable Type
Rather than putting all HDMI cables in one bag and all power cords in another, group cables by the device they belong to. A bag labeled "Soundbar: power cord, optical cable, remote" is far more useful on setup day than sorting through cables by type and trying to remember which one goes where.
Protect Delicate Connectors
Cables with delicate connectors, like certain audio interconnects or older proprietary cords, benefit from a small amount of bubble wrap or a padded pouch. A bent pin on a connector can mean replacing the whole cable.
Setting Up Again: Making Reconnection Painless
Reconnection goes fastest when you unpack in the same order you disconnected: start with the TV, then the receiver or soundbar, then peripherals like streaming devices and game consoles. Refer back to your photos as you go instead of trying to recall the layout from memory.
If your move involves navigating a tricky layout, mounting brackets, or heavy components like a large wall-mounted TV, having help on moving day for the wrapping and placement of bulkier items frees you up to focus on the smaller, detail-heavy work of reconnecting everything correctly. A professional packing crew can box up the TV, speakers, and surrounding furniture correctly while you handle the cords and settings yourself.
Considerations Before Your Move
A little extra prep in the days before your move can prevent most of the common home theater headaches. If you are also working through the rest of the room, our guide on packing a home theater room for moving covers the TV, speakers, and furniture side of the project in more depth, while this article focuses specifically on the cords and remotes that tie it all together.
If your move is part of a larger household relocation, coordinating the small, detail-oriented tasks like this one with the heavier lifting is usually where people run out of time. Booking loading and unloading services for the bulky furniture and boxes gives you room to handle the detailed electronics work without rushing either job.
Whatever the scope of your move, starting with a free moving quote is a simple way to see what kind of help makes sense for your timeline and household.
Frequently Asked Questions
How do I keep HDMI cables from getting mixed up during a move?
Label both ends of each HDMI cable with the device and port it connects to, such as "Receiver HDMI 2 to TV," then coil and secure each cable individually with a twist tie or velcro strap before placing it in a labeled bag or bin.
Should I remove batteries from remotes before moving?
Yes, especially if your move involves storage or several days in transit. Leaving batteries in for an extended period risks corrosion from a leak, which can damage the contacts. Keep the batteries in the same bag as the remote so they are easy to find.
What is the easiest way to remember which cable goes where after moving?
Photograph the back of every device before disconnecting anything, capturing both a wide shot of the full setup and close-ups of each port in use. Refer back to these photos when reconnecting instead of relying on memory.
Should cables and remotes go in the same box as the TV and electronics?
It is better to keep cables and remotes in their own clearly labeled bin separate from the TV and larger components. Small accessories are easy to lose track of when mixed in with bulkier items, and a dedicated bin makes them easy to spot on arrival.
What if I no longer remember which inputs I customized on my TV or receiver?
Before disconnecting anything, open the settings menu on your TV or receiver and photograph any renamed inputs or saved sound profiles. This takes a few extra minutes but saves you from reconfiguring everything from scratch after the move.
How to pack home theater cables and remotes for moving comes down to one habit most people skip: documenting every connection before you touch a single cord. Take a photo of the back of each device, then label both ends of every cable with what it connects and where. Group remotes with their matching devices in clearly marked bags, and you will reconnect your setup in under an hour instead of spending a weekend untangling a mystery pile of cords.
Everyone who has moved a home theater system knows the real pain is rarely the TV itself. It is the shoebox of identical black cables, the universal remote with no visible markings, and the receiver with eight inputs you can no longer remember by heart. This guide focuses specifically on that tangle: how to document, label, bag, and transport the small connective pieces that make your entertainment system actually work, so setup day does not turn into a troubleshooting session.
Why Cables and Remotes Cause More Trouble Than the Electronics Themselves
Cables and remotes go wrong more often than TVs or speakers because they are small, visually similar, and easy to toss into a junk box without a system. A cracked screen is obvious and preventable with padding. A missing HDMI cable or a remote that ended up in a kitchen box is a quieter problem, and it does not surface until you are trying to watch something that night.
Most home theater setups accumulate a surprising number of cords over the years: power cables, HDMI, optical audio, speaker wire, Ethernet, and whatever proprietary cord came with a soundbar or streaming device. None of them are intuitive to sort once they are unplugged, which is exactly why a labeling system matters more here than almost anywhere else in the house.
How Do You Document a Home Theater Setup Before Disconnecting Anything?
Document the setup by photographing the back of every device before you unplug a single cable. Wide shots and close-ups of each port in use give you a visual reference you can check against later, which removes the guesswork entirely.
Take Photos From Multiple Angles
Start with one wide photo showing how all the components sit relative to each other. Then take a close-up of the back of each device, making sure the labels on the ports (HDMI 1, HDMI 2, Optical, and so on) are legible in the shot. If your receiver or soundbar has a settings menu showing input names, photograph that too.
Note Any Custom Settings
If you have renamed inputs on your TV or receiver, or set up a specific sound profile, jot those down in your phone's notes app. Small customizations like these are easy to forget and tedious to redo from scratch.
What Is the Best Way to Label Cables for Moving?
The best way to label cables is to tag both ends of every cord with masking tape or cable flags, writing what the cable is and what it connects to on each end. Labeling only one end leaves you guessing once the cable is coiled up with a dozen others.
Use a Simple Naming System
Something like "TV to Soundbar (Optical)" or "Receiver HDMI 2 to TV" is specific enough to be useful without overcomplicating things. Avoid vague labels like "cable 3," which will mean nothing once everything is unplugged.
Coil and Secure Each Cable Separately
Loosely coil each cable and secure it with a twist tie or velcro strap rather than letting cords tangle loose in a box. A tangled mass of cables takes far longer to sort through than a bin of neatly coiled, labeled cords.
How Should You Pack Remotes So None Go Missing?
Pack each remote in its own labeled sandwich bag along with any batteries, then group those bags together in a single small box or pouch dedicated entirely to remotes. Remotes are small enough to get buried in a junk drawer or tossed into a random box, which is how most of them go missing during a move.
Remove Batteries for Longer Moves
If your move involves storage or a multi-day transit, remove batteries from remotes to prevent corrosion from a leak ruining the contacts. Keep the batteries in the same bag so you are not hunting for replacements later.
Keep the Remote Bag With You, Not on the Truck
Because remotes are small and easy to overlook in a sea of boxes, consider keeping this bag in a personal bag or your vehicle rather than loading it with everything else. It is one less thing to search for on the other end.
How Do You Pack Cables and Small Accessories for the Move Itself?
Pack cables and accessories in a single clear bin or a few labeled boxes kept separate from general household items, rather than scattered across multiple boxes. Clear bins let you see contents at a glance, which saves time during both packing and unpacking.
Group by Device, Not by Cable Type
Rather than putting all HDMI cables in one bag and all power cords in another, group cables by the device they belong to. A bag labeled "Soundbar: power cord, optical cable, remote" is far more useful on setup day than sorting through cables by type and trying to remember which one goes where.
Protect Delicate Connectors
Cables with delicate connectors, like certain audio interconnects or older proprietary cords, benefit from a small amount of bubble wrap or a padded pouch. A bent pin on a connector can mean replacing the whole cable.
Setting Up Again: Making Reconnection Painless
Reconnection goes fastest when you unpack in the same order you disconnected: start with the TV, then the receiver or soundbar, then peripherals like streaming devices and game consoles. Refer back to your photos as you go instead of trying to recall the layout from memory.
If your move involves navigating a tricky layout, mounting brackets, or heavy components like a large wall-mounted TV, having help on moving day for the wrapping and placement of bulkier items frees you up to focus on the smaller, detail-heavy work of reconnecting everything correctly. A professional packing crew can box up the TV, speakers, and surrounding furniture correctly while you handle the cords and settings yourself.
Considerations Before Your Move
A little extra prep in the days before your move can prevent most of the common home theater headaches. If you are also working through the rest of the room, our guide on packing a home theater room for moving covers the TV, speakers, and furniture side of the project in more depth, while this article focuses specifically on the cords and remotes that tie it all together.
If your move is part of a larger household relocation, coordinating the small, detail-oriented tasks like this one with the heavier lifting is usually where people run out of time. Booking loading and unloading services for the bulky furniture and boxes gives you room to handle the detailed electronics work without rushing either job.
Whatever the scope of your move, starting with a free moving quote is a simple way to see what kind of help makes sense for your timeline and household.
Have Questions About Your Move?
How do I keep HDMI cables from getting mixed up during a move?
Label both ends of each HDMI cable with the device and port it connects to, such as "Receiver HDMI 2 to TV," then coil and secure each cable individually with a twist tie or velcro strap before placing it in a labeled bag or bin.
Should I remove batteries from remotes before moving?
Yes, especially if your move involves storage or several days in transit. Leaving batteries in for an extended period risks corrosion from a leak, which can damage the contacts. Keep the batteries in the same bag as the remote so they are easy to find.
What is the easiest way to remember which cable goes where after moving?
Photograph the back of every device before disconnecting anything, capturing both a wide shot of the full setup and close-ups of each port in use. Refer back to these photos when reconnecting instead of relying on memory.
Should cables and remotes go in the same box as the TV and electronics?
It is better to keep cables and remotes in their own clearly labeled bin separate from the TV and larger components. Small accessories are easy to lose track of when mixed in with bulkier items, and a dedicated bin makes them easy to spot on arrival.
What if I no longer remember which inputs I customized on my TV or receiver?
Before disconnecting anything, open the settings menu on your TV or receiver and photograph any renamed inputs or saved sound profiles. This takes a few extra minutes but saves you from reconfiguring everything from scratch after the move.